You can find all the same music teacher musings over on my new site!
Dynamic Devon's Music Lessons
Hope you'll join me!

Friday, July 24, 2015

Thursday, February 26, 2015
Collaboration in the music classroom!
Collaboration is one of our focus 21st Century Skills highlight in Common Core. I had students collaborate to make fingering chart posters. Instead of the complicated fingering charts found in the back of the book, I had students in groups of three or four make a chart of the first five notes.

Each student had a different color and was responsible for at least one note. The students could help each other using their words, but were not allowed to draw with someone else's color. They had to discuss layout, who would draw which note, line and space numbers, and fingering chart terms.
Now I have awesome posters for my classroom that are easy to look at and make sense to the kids! As soon as we learn some more notes, we'll repeat the process and make some more posters!
Thursday, February 12, 2015
Advocacy Through Videos! - Using the iMovie App to Promote Music Education
My principal asked if I could make a video to about the music program to show at a meeting. I said sure, thinking it couldn't be too hard. And it wasn't!
iMovie is a FREE and easy to use app. I took some videos of my students and then used the app to put them together. I also took a video of myself introducing the video. I used a combination of pictures and videos. To edit a clip, tap and hold either end to cut off as much as you need. I'm thinking about making a comprehensive tutorial, but that really is basically it. I saved the video to my camera roll and then uploaded it to my district YouTube channel to share.
I thought the video was just to spice up a boring presentation; but the video took off! It was posted in the next day's Enews, our district newsletter that goes to all employees, right at the top! Egads!
I was blown away by the popularity of the video. In talking with a colleague about it, she said, "Something that was a kind of throw away thing for you was something that others were really craving." I guess I really aught to make more then! I'd really like to take one of each grade level, but we'll see!
To maintain privacy, any video that I post to the public I try not to have children's faces in the videos. Here is the video I took for the 3rd grade Learning Center activities of the previous post.
How do you use videos to advocate for your program?
iMovie is a FREE and easy to use app. I took some videos of my students and then used the app to put them together. I also took a video of myself introducing the video. I used a combination of pictures and videos. To edit a clip, tap and hold either end to cut off as much as you need. I'm thinking about making a comprehensive tutorial, but that really is basically it. I saved the video to my camera roll and then uploaded it to my district YouTube channel to share.
I thought the video was just to spice up a boring presentation; but the video took off! It was posted in the next day's Enews, our district newsletter that goes to all employees, right at the top! Egads!
I was blown away by the popularity of the video. In talking with a colleague about it, she said, "Something that was a kind of throw away thing for you was something that others were really craving." I guess I really aught to make more then! I'd really like to take one of each grade level, but we'll see!
To maintain privacy, any video that I post to the public I try not to have children's faces in the videos. Here is the video I took for the 3rd grade Learning Center activities of the previous post.
How do you use videos to advocate for your program?
Friday, February 6, 2015
Learning Centers in the Music Room - 3rd grade Recorders and Reading the Music Staff
Today I showed being a risk-taker and I tried learning centers for my 3rd grade recorder class. I am now a convert! They were a great way to get students actively involved in reviewing many different concepts in the same lesson. Learning centers require students to be communicators by showing cooperation with others.


For my classes of 24 third graders I used six stations.
1) Note Speller
Students use mancala tiles on laminated five line staves to make words. First however, they start with the basic line 1, line 2, etc. and then they do the basic spaces. Thinking about it now, those should have been line E, line G, line B review cards! After reviewing the lines and spaces they start making the words. They use the answer key to help them spell the words. This could also be a partner activity where one person has the word and has to help the other person out the tile in the right place using just their words.
2) Treble Clef Staff Races
One student as the "teacher" goes through one of four stacks of cards. There is a stack of line numbers, space numbers, line letters, and space letters. The teacher picks a stack and says the card. The other students rush to that spot on the staff. The teacher says switch and they go back to the start underneath the staff. Once the teacher is done with a stack, a new student becomes the teacher. Students start with the line and space number stacks. I have a poster with the names of the lines and spaces nearby for reference.
3) Recorder Memory
This memory game has three parts, the recorder fingering, the name of the note, and the location of the note on the staff. My students had a hard time with all three, so I simplified it to be just the name of the note and the fingering. Since this was our first time doing this, I gave them a reference sheet to check.
4) Treble Clef Flash Cards
Two sets of flashcards! Free download from Making Music Fun.
5) Drawing the Treble Clef
At this station students use a worksheet that I drew to practice writing the treble clef.
6) Recorder Practice
At this station, students practice playing their recorders with me!
Thanks to the fabulous Music with Mrs. Dennis blog for some of these ideas!
Saturday, January 31, 2015
App in Focus: Singing Fingers - See What You Sing!
Singing Fingers is so much fun and makes it easy for kids to assess themselves!
This app opens on a blank page. When you draw on the page with your finger the app records whatever sound is around. The color that is drawn is related to pitch and the size of the line is related to the relative dynamic.
Today I tried this app with a group of first graders. We're practicing matching pitch and getting into the head voice with some octave low high low oooooo sounds. I sang and drew a line going up and down following the contour. Because I sang an octave, the starting color, high point, and ending color are all the same. The kids echoed my voice and I drew while they sang, again following a contour. They could visually see where they had sung the same pitch as me and where they had a different pitch because the colors were different.
The first time we tried it they didn't really move pitch much at all. I had them add a low high low hand gesture while they were singing and it got a bit better!
The students were really engaged with this app and I plan on using it in the future!

The students were really engaged with this app and I plan on using it in the future!
Did I mention it's FREE?!
Tuesday, October 7, 2014
Traditional Spanish Nursery Rhyme "Sana, Sana" on the Recorder!
We hear lots of educational buzz phrases like culturally appropriate, engaging, and prior knowledge. But what does it mean for teaching music to students who primarily speak Spanish at home? For me, I incorporate Spanish songs and chants into my curriculum.
This year I started my third graders learning the recorder by adapting a well known Spanish nursery rhyme. I found the chant "Sana, sana" in the book El Patio de Mi Casa by Gabriela Montoya-Stier. I set the chant to an easy rhythm and assigned notes of B, A, and G. I only used one A, as the focus of the song is really learning B and G.

Sana, sana, colita de rana,
Heal, heal, little frog tail,
Si no sanas hoy, sanarás mañana.
If you don't feel better today, you'll feel better tomorrow.
The chant is said to children by an adult when the child is hurt. I found that many of the children at my school who speak Spanish at home were familiar with the chant.
I found this to be an excellent beginning song for my students. The song reflects and values their culture, they were engaged because they were able to use their knowledge of Spanish, and they used their prior knowledge of the chant to further develop their musical skills.
Leave a comment if you use this, I'd love to hear feedback!
As with everything on my blog, you are free to use this in your own teaching. You may not use this in any way where you make a profit. If you would like to repost this, please link back to this post.
This year I started my third graders learning the recorder by adapting a well known Spanish nursery rhyme. I found the chant "Sana, sana" in the book El Patio de Mi Casa by Gabriela Montoya-Stier. I set the chant to an easy rhythm and assigned notes of B, A, and G. I only used one A, as the focus of the song is really learning B and G.
Sana, sana, colita de rana,
Heal, heal, little frog tail,
Si no sanas hoy, sanarás mañana.
If you don't feel better today, you'll feel better tomorrow.
The chant is said to children by an adult when the child is hurt. I found that many of the children at my school who speak Spanish at home were familiar with the chant.
I found this to be an excellent beginning song for my students. The song reflects and values their culture, they were engaged because they were able to use their knowledge of Spanish, and they used their prior knowledge of the chant to further develop their musical skills.
Leave a comment if you use this, I'd love to hear feedback!
As with everything on my blog, you are free to use this in your own teaching. You may not use this in any way where you make a profit. If you would like to repost this, please link back to this post.
Thursday, September 18, 2014
Academic Discourse in the Music Room - "Find Your Partner"
During the first year teacher induction program last year, my district gave me a little book they had put together called "Routines for Accountable Academic Discourse." All of these techniques are designed to increase student talk and decrease teacher talk. I used "Find Your Partner" to reinforce instrument names and sounds.

I have found that, over the summer, students seem to forget the names of instruments. When the students turn in their forms after my traditional instrument demo day, I get forms back where students have written the name of one instrument, but they really meant another instrument. Or I get things like "clumpet." My goal when doing instrument demos this year was to add an activity that would reinforce instrument names and result in students asking for the instrument they meant to ask for.
"Find Your Partner" is an activity where the teacher prepares sets of things, such as the first and last halves of a sentence. The teacher passes these out and the students go to find their partner, the person who has the other part of their sentence. During this time of trying to find their partner, students use lots of academic language while talking with one another. This can also be done with categories of things, which is how I used it.
To prepare, I made cards with an instrument's name, a picture of the instrument, a description of what it looked like, and a description of what it sounded like.
Find Your Partner is easily differentiated! I gave my ELL and special needs students the easier cards that had either just the single word or the picture and I gave my better readers the cards that described the sound of the instrument. To ease reading anxiety, I read each card as I handed it out.
This activity can be used to randomly group students or you can have preassigned groups that they discover after the activity.
One could say that based on the pre-assessment of how the forms were filled out last year and the post-assessment of how they were filled out this year, this activity is successful! The number of correctly filled out forms increased dramatically.
I will definitely use this Routine again because it was easy to implement and fun!
Friday, April 11, 2014
Inductive Learning in the Music Room - Common Core Strategy!
Inductive Learning is one of six essential strategies presented in The Core Six by Silver, Dewing, and Perini.

The basis of the strategy involves students grouping items before the lesson, making predictions based on the groups, and then evaluating their predictions based on the lesson.
For the music room, I decided to try this with my second grade classes for learning about the instruments of the orchestra.
To prepare, I made cards with a picture of each instrument and the instrument name. I laminated them and put magnets on the back. (I get business card size adhesive magnets from Staples.)
As students entered I gave them an instrument. To make the groups, I held up an example card and had them evaluate if their instrument should go with mine. The easiest ones to start with were the brass instruments. These students came up to the board and I asked this group, "Why do these instruments go together." They made some great observations including size, color, shape, valves, and mouthpieces. The group put theirs on the board and I labeled the group with its name.
Once all the groups were on the board I asked the students to think about what they thought the group would sound like. Soft or loud, fast or slow, like a party or like a lullaby. I gave them lots of options and words to use to form guesses. I wrote the guess on the board in black. After someone made a guess I told the class to listen to see if they agreed or disagreed.
With my iPad mirrored to the AppleTV (you could also just plug the iPad into some speakers), I played the instrument families sections on the app Benjamin Britten's Young Person's Guide to the Orchestra. After each prediction, I played the section, and the students gave evidence that agreed or disagreed. I wrote this on the board in green for agree and red for disagree.
While we were listening I had the students move to the music, one distinct movement for each instrument family. After the agree/disagree discussion was finished I then played the recording of the piece showing the video so the students could see the instruments we just heard being played. While they were listening, they showed me what they heard by moving for that instrument family's movement.
The children came up with some great observations about the instruments before they even heard what they sounded like! predicting what the instrument family groups would sound like was a little hard due to limited language.
The kids really liked it and it was a fun way to introduce the orchestra!
Tuesday, February 4, 2014
Using EduCreations as Visual Aid for English Language Learners
My school has a high population of English Language Learners. When I teach songs I make sure that all students know the meaning of the words.

One of the ways I do this is through using the EduCreations app. I search for images from Google Images and save them to the iPad. In the app I select a picture and then type lyrics on top. I move forward one page and repeat the process for the rest of the lyrics. The last step is to go back to the first page, hit the record button, and then I sing the song along with the images.
Watch the video on the educreations website.
Watch the video on the educreations website.
During class I mirror my iPad to the AppleTV. I play the video and we sing along. I can pause and we can discuss the picture and the words. I can also point to each word as we sing, like live karaoke!
I think this process helps all the students learn the words of the song.
How do you use EduCreations?
Monday, January 27, 2014
App in Focus: Young Person's Guide to the Orchestra
The Young Person's Guide to the Orchestra is free application that is a must for any music classroom! It contains an essential introduction to the instruments and players of the orchestra as well as aural quizzes and form games.


At the core of the app is a recording of Benjamin Britten's piece performed by the Royal Northern College of Music Symphony Orchestra and conducted by Sir Mark Elder. The recording can be played with either a scrolling condensed score or with a video of the performers.
At the left of the score are icons of who is playing which line. Above the score are notes about what is happening and what to listen for. I plan to use this with some guided questions or a graphic organizer for students to follow as they listen and watch. Easily adapted for use across several grade levels.
But the fun doesn't stop there! My next favorite part of this app is the Aural Quiz. It starts out with identifying instruments into their family groups and the difficulty increases as the levels continue. I could see children easily loving this game. With my iPad mirrored to my Apple TV, we could play this game as a class.
There are two games that teach and play with form in the app. Both are very user friendly and make learning about fugue and variation fun. Both also have example recordings with the same kind of extraordinarily helpful explanation text that follows the music as it plays. Children can create their own composition using the variables provided and use musical terminology to explain their choices.
As if that wasn't enough content for a FREE app, there's still more! There are video interviews with the university students who play the music and information about Benjamin Britten's life.
Wonderful app that students and teachers will enjoy! Download it today!
Saturday, January 25, 2014
But what's in it for music teachers?
There is a common perspective among music teachers that professional development has to be music specific if it is to be of any relevance to their teaching. This attitude belies the richness of professional development and the possibilities it brings for music education.

I just got back from a weekend of training at an International Baccalaureate conference. Full of ideas, inspiration, and teachers working towards improving their practice, I found the conference invigorating despite the fact that I didn't run into another music teacher the whole time I was there. The workshop I went to was called "Making the PYP Happen in the Classroom" and was an introduction to the Primary Years Program (PYP) philosophy and practice.
Inquiry is at the heart of the IB program. How can we design experiences for children that allow them to wonder and ask questions? This kind of lesson design results in student directed learning, which increases achievement. It also decreases the amount of teacher talk, since the ideas and questions of the students are used to initiate possible new lines of inquiry. Instead of instruction as monologue, it is instruction as dialogue.

While at the conference my creative teaching mind was inspired! I started thinking about how I could design an inquiry unit for my second grade students about string instruments.
How could I introduce string instruments in a way where all of the knowledge came from the children and their observations about the instruments? I'm still deciding how this will look, but our first lesson in this unit will be an exploration. The students will describe the look, feel, and sound of string instruments on poster paper. After we have explored several different string instruments we will compare the similarities and differences between the instruments. Then we can come up with a list of common attributes that creates the string instrument category.
I'm still writing and thinking about this unit and nothing is set in stone except one thing. Professional development is about learning how to be a good teacher, and that applies to all subject areas.
Sunday, January 12, 2014
Rap a Tap Tap - Music, Dance and Literacy Lesson Plan
Tap your feet and tip you hat, here comes a lesson for Rap a Tap Tap: Here's Bojangles, Think of That! by Diane Dillon. This lively book tells the story of Bill "Bojangles" Robinson, considered by many to be the best tap dancer of all time.

Integrating books and literature into music lessons increases cross-curricular learning and student engagement. However, being in my first year of teaching, I don't already have a collection of books to use. I am fortunate to work at a school that still has a library and in perusing the shelves I found Rap a Tap Tap.
The book alternates between a line of new text and a repeating phrase, perfect for young music learners. I set the repeating phrase to music, taught the words and rhythm first, and then added the music. While teaching the words we practiced using our different voices, our big bear voice, our little mouse voice, and then we used our singing voice.

We read the book together, all singing the "Rap a tap tap" part together. We talked about dancing, about making sounds with our feet, and how that sound could be music.
I asked the children if they would like to see Mr. Bojangles dance. Of course they said yes!
For this video I played the introduction and then skipped to the part where Mr. Bojangles dances. I first let the kids just watch the video, and then we all stood up and danced with the video on the second viewing.
This video is very fun as Shirley Temple plays a little girl who doesn't want to go to bed. The children can certainly identify with this! I also like the video because it shows the children that kids their age can do this type of dancing too.
I did this lesson with kindergarten children, so we just explored moving our legs and arms the way Mr. Bojangles does. They have a blast moving their feet and bodies around to the music. If you have some tap dance background, you could do a similar lesson and teach a few steps with older children.
Enjoy!

Integrating books and literature into music lessons increases cross-curricular learning and student engagement. However, being in my first year of teaching, I don't already have a collection of books to use. I am fortunate to work at a school that still has a library and in perusing the shelves I found Rap a Tap Tap.
The book alternates between a line of new text and a repeating phrase, perfect for young music learners. I set the repeating phrase to music, taught the words and rhythm first, and then added the music. While teaching the words we practiced using our different voices, our big bear voice, our little mouse voice, and then we used our singing voice.

We read the book together, all singing the "Rap a tap tap" part together. We talked about dancing, about making sounds with our feet, and how that sound could be music.
I asked the children if they would like to see Mr. Bojangles dance. Of course they said yes!
For this video I played the introduction and then skipped to the part where Mr. Bojangles dances. I first let the kids just watch the video, and then we all stood up and danced with the video on the second viewing.
This video is very fun as Shirley Temple plays a little girl who doesn't want to go to bed. The children can certainly identify with this! I also like the video because it shows the children that kids their age can do this type of dancing too.
I did this lesson with kindergarten children, so we just explored moving our legs and arms the way Mr. Bojangles does. They have a blast moving their feet and bodies around to the music. If you have some tap dance background, you could do a similar lesson and teach a few steps with older children.
Enjoy!
Monday, December 30, 2013
First Concert Done!
The school has successfully put on our first concert! I followed the example of a nearby school and split the concert into two assemblies. The first assembly had Kindergarten, 3rd, 5th, and 6th grades. The second assembly had 1st, 2nd, and 4th grades. I liked the way the concert had different elements to it with singing and instrumental music.
The best thing about the concert was that I did not have the students get on and off stage. We don't have permanent seating because it is one of those cafetoriums. Therefore, I had all the students sit in the auditorium. When it was their turn I had them stand and when they were done they sat down. It worked very well not having them get on and off stage. It made the concerts short, so now I know if I do the same thing again we can have more music!
I had a star and night "theme." It was really just an idea in my head that helped me pick songs for the younger kids to sing. Next time I would like to get the grades a bit more integrated as far as a theme goes. I am pondering organizing something around the Great Kapok Tree.
My favorite comment about the concert came from a second grader. She said her favorite part was when her mom clapped after she sang. That is what it's all about!
The best thing about the concert was that I did not have the students get on and off stage. We don't have permanent seating because it is one of those cafetoriums. Therefore, I had all the students sit in the auditorium. When it was their turn I had them stand and when they were done they sat down. It worked very well not having them get on and off stage. It made the concerts short, so now I know if I do the same thing again we can have more music!
I had a star and night "theme." It was really just an idea in my head that helped me pick songs for the younger kids to sing. Next time I would like to get the grades a bit more integrated as far as a theme goes. I am pondering organizing something around the Great Kapok Tree.
My favorite comment about the concert came from a second grader. She said her favorite part was when her mom clapped after she sang. That is what it's all about!
Friday, December 27, 2013
First Lesson on Dynamics and Following the Conductor - Donor's Choose Instruments
When our instruments from our Donor's Choose project came in, the students were very excited! All of the children love to play the instruments and look forward to any time I announce that we will be playing them.
This lesson is very easy to do and you don't need a special set of instruments. Any set on nonpitched percussion will do, one instrument for every student.
As I pass out instruments I have the students echo me. I say a four beat rhythm or a sing a short melodic phrase. I saw a teacher do this on a video and thought it as brilliant. When I hand out an instrument they know to hold it without making noise.
First we practice not playing the instruments. All students put their instruments in their lap and copy my hand gestures. I teach two gestures before we begin and have them copy with their hands. First is hands open with palms up, an inviting gesture. The second is hands closed into fists with palms down, a closing gesture. I assess visually to make sure that every student has copied my hands.
Then they pick up their instruments and I conduct using the two basic gestures. They love it! And it is a perfect introduction to watching the conductor. I play around with long and short durations of playing and of silence.
With all the students watching I communicate to play softly through body language and keeping my hands low near my belly button. Then of course there is the contrasting loud, also communicated through body language with my hands up near my head. I still occasionally include silence so that they all stay watching.
These gestures are very basic and the students catch on quickly. After I have taught this I have a student come up and conduct the group. They all want to be the conductor!
This whole lesson took about five minutes and I will use it again to practice loud, soft, watching the conductor, and student leadership.
This lesson is very easy to do and you don't need a special set of instruments. Any set on nonpitched percussion will do, one instrument for every student.
As I pass out instruments I have the students echo me. I say a four beat rhythm or a sing a short melodic phrase. I saw a teacher do this on a video and thought it as brilliant. When I hand out an instrument they know to hold it without making noise.
First we practice not playing the instruments. All students put their instruments in their lap and copy my hand gestures. I teach two gestures before we begin and have them copy with their hands. First is hands open with palms up, an inviting gesture. The second is hands closed into fists with palms down, a closing gesture. I assess visually to make sure that every student has copied my hands.
Then they pick up their instruments and I conduct using the two basic gestures. They love it! And it is a perfect introduction to watching the conductor. I play around with long and short durations of playing and of silence.
With all the students watching I communicate to play softly through body language and keeping my hands low near my belly button. Then of course there is the contrasting loud, also communicated through body language with my hands up near my head. I still occasionally include silence so that they all stay watching.
These gestures are very basic and the students catch on quickly. After I have taught this I have a student come up and conduct the group. They all want to be the conductor!
This whole lesson took about five minutes and I will use it again to practice loud, soft, watching the conductor, and student leadership.
Tuesday, December 3, 2013
Teaching Through Modeling "I'm Sorry"
As a first year teacher I do things just because others have said it is a good idea to do. Theoretically I know why these things are suggested, but I mostly just blindly follow them. Today I understand why one of those ideas is worth it.
That idea is modeling how to say you are sorry by apologizing to children when you make a mistake. My third or fourth week I raised my voice to speak to a sixth grader. I did not perceive it as yelling because I was simply talking over the crowded band room, but he perceived it as yelling at him. I spoke to him privately in the hall, apologized for hurting his feelings, and went back to class. His attitude was defiant and standoffish for the rest of the period.
During the next few weeks, he was still trying to figure me out. But I pretended not to know what was going on. I treated him kindly, greeted him by name, and kept teaching. I acted as if we were on good terms.
Yesterday, he and a friend were talking in class because neither of them had brought their instruments. I told his friend to move to the back to fill out the alternate assignment and instead of his friend getting up to move, he got up in quite the huff. I explained that it was not him that was to move, but his friend. He started talking back to me angrily, saying that his friend had not done anything and it wasn't fair. We got into a back and forth, but this time all I said was a calm, "Please sit down." I must have repeated it twenty times but it felt like a hundred. In the moment I thought he would not sit down, that he would stand there defiantly forever. But he eventually did sit down and his friend moved to the back.
But that's not really the interesting part. The best part about all of this happened after class when he apologized to me for his behavior. I don't think this would have happened if I hadn't apologize to him. I believe he apologized because I followed the advice of those who have taught before me, and showed him how to say you're sorry for being human once in a while.
That idea is modeling how to say you are sorry by apologizing to children when you make a mistake. My third or fourth week I raised my voice to speak to a sixth grader. I did not perceive it as yelling because I was simply talking over the crowded band room, but he perceived it as yelling at him. I spoke to him privately in the hall, apologized for hurting his feelings, and went back to class. His attitude was defiant and standoffish for the rest of the period.
During the next few weeks, he was still trying to figure me out. But I pretended not to know what was going on. I treated him kindly, greeted him by name, and kept teaching. I acted as if we were on good terms.
Yesterday, he and a friend were talking in class because neither of them had brought their instruments. I told his friend to move to the back to fill out the alternate assignment and instead of his friend getting up to move, he got up in quite the huff. I explained that it was not him that was to move, but his friend. He started talking back to me angrily, saying that his friend had not done anything and it wasn't fair. We got into a back and forth, but this time all I said was a calm, "Please sit down." I must have repeated it twenty times but it felt like a hundred. In the moment I thought he would not sit down, that he would stand there defiantly forever. But he eventually did sit down and his friend moved to the back.
But that's not really the interesting part. The best part about all of this happened after class when he apologized to me for his behavior. I don't think this would have happened if I hadn't apologize to him. I believe he apologized because I followed the advice of those who have taught before me, and showed him how to say you're sorry for being human once in a while.
Sunday, December 1, 2013
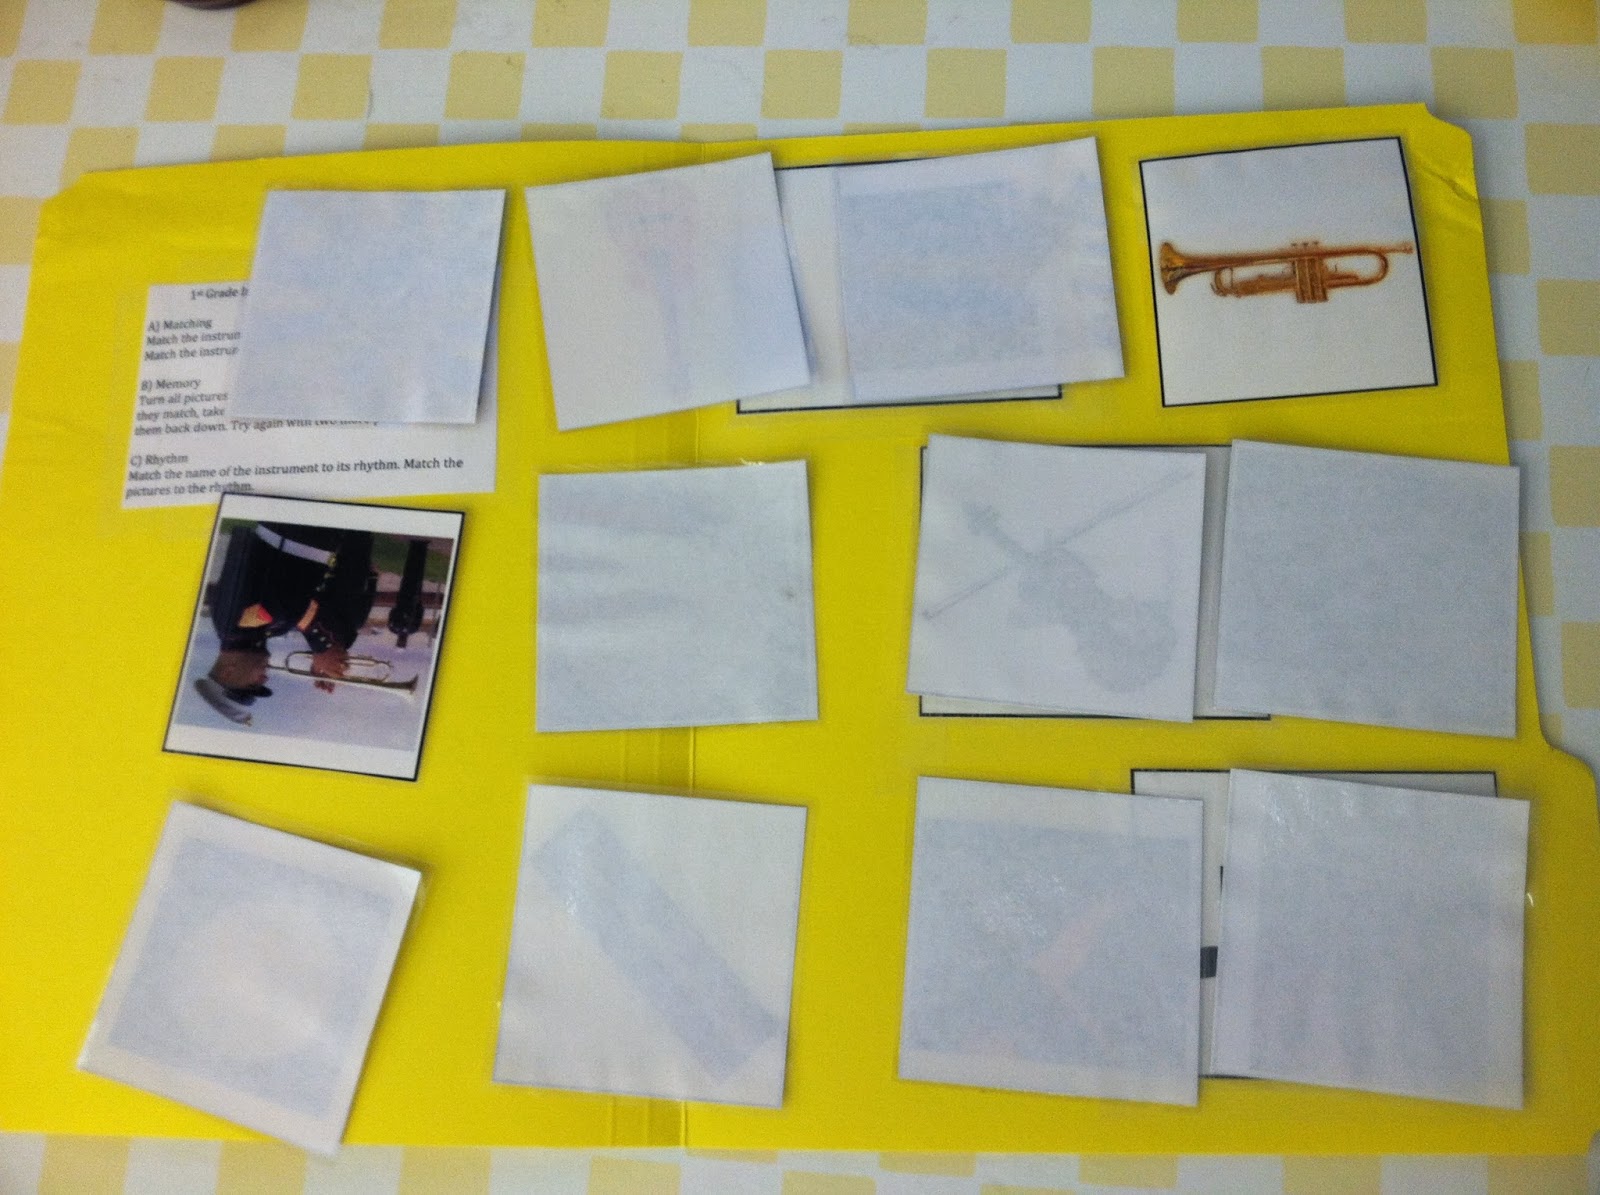
1st Grade -Common Instruments- File Folder Game
I have been enjoying creating visuals and games to use in my classroom. Today I present a file folder game for use in 1st grade. The pdf file for this game is free and available from my TpT store.
It includes five common instruments and one uncommon: guitar, piano, trumpet, drum, violin, and recorder. I included recorder because we play it in 3rd grade at my school.

The file includes:
- Pictures of each instrument
- Pictures of a person playing each instrument
- Written word for each instrument
- Quarter notes to represent syllables

4 games are playable.
1) Match each instrument to the person playing the instrument.
2) Match the written words to the instruments.
3) Categorize each instrument as one, two, or three syllables.
4) Memory game matching each instrument to the person playing the instrument.

All images are copyright under Creative Commons or Free Use.
Happy Teaching!
It includes five common instruments and one uncommon: guitar, piano, trumpet, drum, violin, and recorder. I included recorder because we play it in 3rd grade at my school.

The file includes:
- Pictures of each instrument
- Pictures of a person playing each instrument
- Written word for each instrument
- Quarter notes to represent syllables

4 games are playable.
1) Match each instrument to the person playing the instrument.
2) Match the written words to the instruments.
3) Categorize each instrument as one, two, or three syllables.
4) Memory game matching each instrument to the person playing the instrument.
All images are copyright under Creative Commons or Free Use.
Happy Teaching!
Monday, November 4, 2013
Donor's Choose - First Project!
My first project is up on Donor's Choose! I have requested a variety of percussion instruments to use with Kindergarten through third grade students to compose music. It is so wonderful to give children a way to express themselves with music!
Donating is very easy and the students will very much appreciate it! My project has match funding, so every dollar you donate will be doubled!

This website is all about getting teachers what they need. They are a 501(c)3 charity, so all money donated to them is tax deductible!
If you are a teacher and curious about posting a project on Donor's Choose, do it! The process is not that hard, you can save your progress along the way so you can do it in the few spare moments you find, and you never know who out there will see what you're doing and donate to your classroom!
I'm terribly excited!
Donating is very easy and the students will very much appreciate it! My project has match funding, so every dollar you donate will be doubled!
This website is all about getting teachers what they need. They are a 501(c)3 charity, so all money donated to them is tax deductible!
If you are a teacher and curious about posting a project on Donor's Choose, do it! The process is not that hard, you can save your progress along the way so you can do it in the few spare moments you find, and you never know who out there will see what you're doing and donate to your classroom!
I'm terribly excited!
Monday, October 28, 2013
Dem Bones Lesson Plan - Halloween or Health

The kids love this one, from 1st through 3rd, this one is fun! To introduce the book I sang the chorus using the phrase "dancing bones" instead of the traditional "dry bones. First I "read" the book by singing the song. I love using singable picture books in music class because it helps engage students in music and in reading. One of my classes clapped when the book was finished!
The song "Dem Bones" is a traditional African American spiritual. I particularly like Bob Barner's book because the skeletons are all playing instruments!
The song "Dem Bones" is a traditional African American spiritual. I particularly like Bob Barner's book because the skeletons are all playing instruments!
On the second sing through I had the kids touch the place on their body that the song is talking about and invited them to sing with me if they wanted. It is an easy melody and they catch on very quickly.
Then we watched this video and danced along! I like this video because they changed the lyrics "Hear the word of the Lord" to "That's the way it goes" so I can use it in the public school classroom. I modeled doing some bone dances to get the kids thinking about different ways to move their body to the music.
There is nothing that really ties this book to Halloween specifically, so it could also be used when the students are studying the systems of the body. The book has facts about each bone in the song for further discussion and for those students who always want to know more!
Wednesday, October 23, 2013
Weather Song Lesson Plan - Special Education/ Special Day Class
What's better than music class once a week? Music class twice a week! The students in the Special Day Class at my school receive music instruction during with their classroom teacher and they also come for music as a special day class group. This group of eleven kids ranges in grades from 2nd-6th.
When I was in their special day classroom observing, the teacher was talking about how to know what to wear based on the weather. I thought this weather song would be a good tie in.
The first week I taught them the weather song by rote. I like how this video models teaching the song with the speaking voice first and then adding the melody. Afterwards, I sang and they sang back to me keeping a steady beat on their body.
I showed pictures of each of the types of weather that the song discusses using my iPad. When we were singing about sunny, there was the picture of a sunny day. I asked for which two we should focus on and we sang the ending phrase on just those two.
The second week I reviewed the song using half drawings. I wrote Sunny, Rainy, Cloudy, Snowy, and Windy on pieces of paper. Then I started a drawing of each one. As we reviewed the song, I used these for the new visuals. The students then finished the drawings in pairs, adding something to the picture that had to do with that type of weather.

I finished our review of that song on that day by singing the song again with student volunteers coming up to the board and pointing to the order of the pictures that occurs in the song.
Next week when we review our song, we will talk about how the weather is predicted and what type of clothing we should wear for each type of weather.
When I was in their special day classroom observing, the teacher was talking about how to know what to wear based on the weather. I thought this weather song would be a good tie in.
The first week I taught them the weather song by rote. I like how this video models teaching the song with the speaking voice first and then adding the melody. Afterwards, I sang and they sang back to me keeping a steady beat on their body.
I showed pictures of each of the types of weather that the song discusses using my iPad. When we were singing about sunny, there was the picture of a sunny day. I asked for which two we should focus on and we sang the ending phrase on just those two.
The second week I reviewed the song using half drawings. I wrote Sunny, Rainy, Cloudy, Snowy, and Windy on pieces of paper. Then I started a drawing of each one. As we reviewed the song, I used these for the new visuals. The students then finished the drawings in pairs, adding something to the picture that had to do with that type of weather.

I finished our review of that song on that day by singing the song again with student volunteers coming up to the board and pointing to the order of the pictures that occurs in the song.
Next week when we review our song, we will talk about how the weather is predicted and what type of clothing we should wear for each type of weather.
Thursday, October 10, 2013
Clarinet Troubleshooting and Repair
This week I showed my elementary music teacher colleagues quick fixes for clarinet repair and thought I'd share here too!
Problem: No sound is coming out or the clarinet keeps squeaking.
- Check the reed! Kids are notorious for chewing on, maiming, or destroying reeds. Crooked reeds also won't play.
- Check the ligature! Ligatures that are too loose, too tight, too high, or too low won't be holding the reed on in the right place.
- Check the player's embouchure.
Problem: Some notes play, but others don't
There is probably a pad leaking or missing somewhere. Check everywhere! It might be a pad that isn't used a lot. It could also be a pad that is still attached, but where the membrane has worn off. If the membrane is worn, then air can leak through.
- If the pad is there, put a piece of teflon tape around it to hold the pad in place. If there is no pad, use a piece of silly putty as a makeshift pad and hold in place with teflon tape.
Problem: No ligature
- Rubber bands or hair ties work to get through concert night.
Problem: Loose or wiggling keys.
- There is a screw missing or loose. Screws often just come loose on their own. Invest in a dollar store eyeglass repair kit. The screwdrivers come in a variety of sizes so you can use the one that is the right size for the screw. When putting the screw back in, try your best not to damage the metal.
- A spring has come loose. Compare the none working clarinet to one that is working. There are many small springs that are simple rods. The rods need to be in the right place to apply pressure so that the keys spring back up.
Problem: Joints are too loose.
In older clarinets the corks can become very worn down. Use as much teflon tape as you need to get a secure connection. You will need to take it in to get the cork redone.
Problem: Joints are very hard to get together and apart.
Common in new clarinets. Use a polishing nail file to gently sand some of the cork away. Make sure you don't sand any of the wood, that you sand evenly, and that you only sand a bit off at a time.
Hope this helps!
Problem: No sound is coming out or the clarinet keeps squeaking.
- Check the reed! Kids are notorious for chewing on, maiming, or destroying reeds. Crooked reeds also won't play.
- Check the ligature! Ligatures that are too loose, too tight, too high, or too low won't be holding the reed on in the right place.
- Check the player's embouchure.
Problem: Some notes play, but others don't
There is probably a pad leaking or missing somewhere. Check everywhere! It might be a pad that isn't used a lot. It could also be a pad that is still attached, but where the membrane has worn off. If the membrane is worn, then air can leak through.
- If the pad is there, put a piece of teflon tape around it to hold the pad in place. If there is no pad, use a piece of silly putty as a makeshift pad and hold in place with teflon tape.
Problem: No ligature
- Rubber bands or hair ties work to get through concert night.
Problem: Loose or wiggling keys.
- There is a screw missing or loose. Screws often just come loose on their own. Invest in a dollar store eyeglass repair kit. The screwdrivers come in a variety of sizes so you can use the one that is the right size for the screw. When putting the screw back in, try your best not to damage the metal.
- A spring has come loose. Compare the none working clarinet to one that is working. There are many small springs that are simple rods. The rods need to be in the right place to apply pressure so that the keys spring back up.
Problem: Joints are too loose.
In older clarinets the corks can become very worn down. Use as much teflon tape as you need to get a secure connection. You will need to take it in to get the cork redone.
Problem: Joints are very hard to get together and apart.
Common in new clarinets. Use a polishing nail file to gently sand some of the cork away. Make sure you don't sand any of the wood, that you sand evenly, and that you only sand a bit off at a time.
Hope this helps!
Subscribe to:
Posts (Atom)